Makeup for Beginners: A Step-by-Step Guide to a Flawless Natural Look
Ready to dive into the world of makeup? This simple guide will walk you through creating a beautiful, natural look that enhances your features without feeling heavy.
Saad Sellami
Founder & Data Analyst, OutfitScore
Published: January 24, 2025
Reading time: 5 minutes
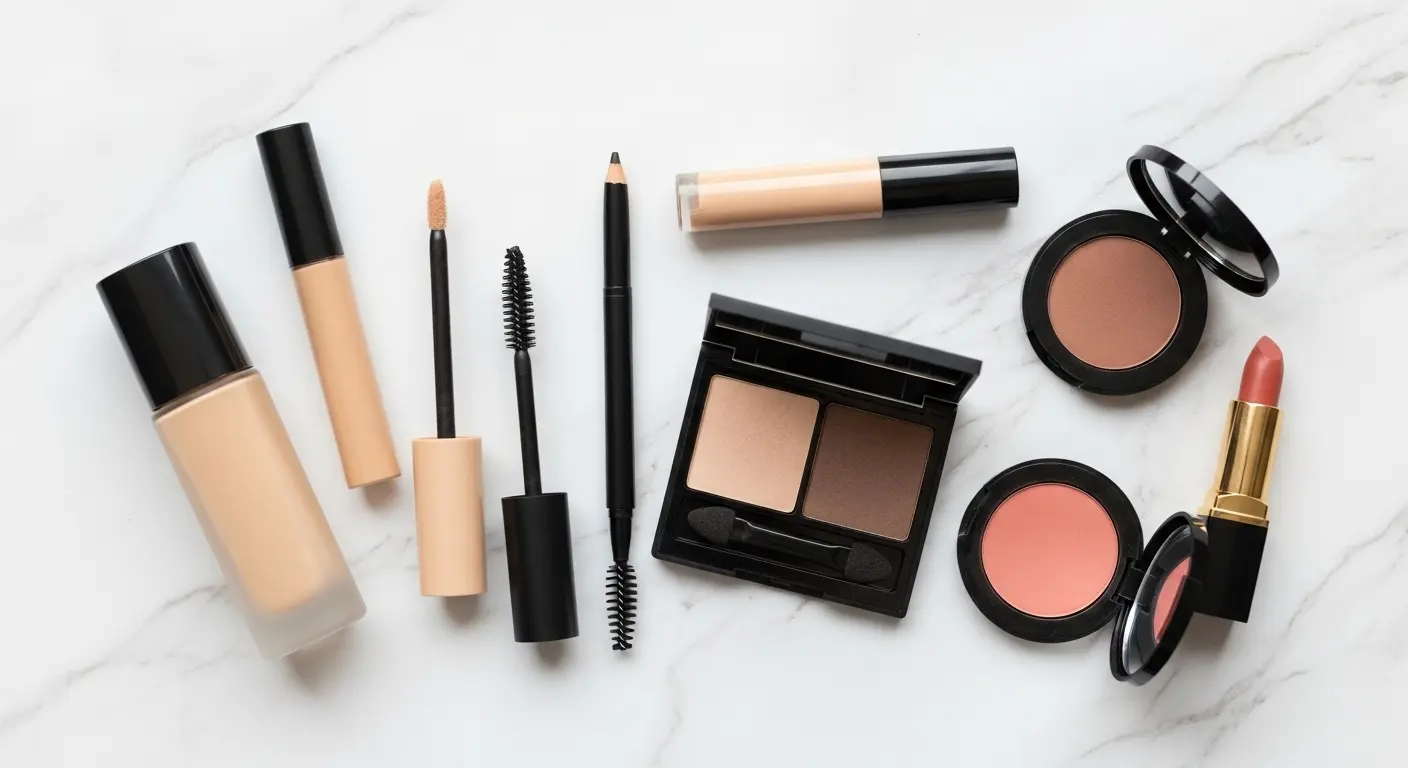
The right essentials are key to a beautiful, natural look.
The goal of a natural makeup look is to enhance your features, not to mask them. It's about looking like the best version of yourself. This "no-makeup makeup" look is perfect for everyday wear, from the office to a casual weekend brunch.
The 6-Step Natural Look Tutorial
Step 1: Skin Prep is Non-Negotiable
Great makeup starts with great skin. Before you apply any products, make sure your face is clean and moisturized. This creates a smooth canvas for your makeup to glide on and last all day. Don't forget sunscreen!
Step 2: Create an Even Base
The goal here is to even out your skin tone, not to cover it completely. Use a lightweight foundation or a tinted moisturizer. Apply a small amount to the center of your face and blend outwards with your fingers, a brush, or a damp sponge. Add a dot of concealer under the eyes and on any blemishes.
Step 3: Define Your Brows
Well-groomed eyebrows frame your face. Use an eyebrow pencil or powder to lightly fill in any sparse areas using short, hair-like strokes. Then, brush them into place with a spoolie.
Step 4: Enhance Your Eyes
For a natural look, stick to neutral eyeshadows. Apply a light, shimmery shade all over your lid and a slightly darker matte shade in the crease for subtle definition. Finish with one or two coats of mascara on your top lashes.
Step 5: Add a Healthy Flush
Cream blush gives the most natural, skin-like finish. Smile and apply a small amount to the apples of your cheeks, blending upwards towards your temples.
Step 6: Finish with a Natural Lip
Choose a lipstick or tinted lip balm that's one or two shades darker than your natural lip color. A "my lips but better" shade is the perfect finishing touch.
Six natural makeup looks the AI has already scored
Each look below uses the products and steps from the six-step tutorial. The AI scores skin finish, colour harmony, and how well the look matches the natural "no-makeup makeup" brief.
Skin prep, tinted moisturizer, cream blush, tinted lip balm
86/100The lightest possible base over prepped skin. The AI rewards visible skin texture and the matched cheek-to-lip warmth.
Dewy skin prep, spot concealer only, cream blush, glossy lip
84/100Skipping full foundation keeps the finish skin-like, and concealer is used only where the skin actually needs it.
Light foundation, filled brows, neutral shadow, one coat of mascara
81/100The six-step routine followed exactly as written. Brows and lashes frame the face without the base ever reading heavy.
Neutral eye, cream blush, glossy lip, brows left bare
68/100Good colour balance, but unfilled brows leave the upper face undefined, which the AI reads as an incomplete frame.
Full-coverage foundation, smoky eyeshadow, matte lip
57/100Technically skilled but the opposite of the natural brief. The heavy base and dramatic eye are marked down for masking the features and for occasion mismatch.
No skin prep, powder foundation, heavy contour
55/100Dry skin under powder foundation creates patchiness, and the contour reads as masking rather than enhancing the face.
Did You Get the Natural Look Right?
Upload a selfie and let our AI evaluate your foundation blend, color theory, and feature enhancement. Get a 0-100 beauty score and instant feedback.
Rate My Makeup (Free)Skin Prep Order: The Layers That Make or Break Your Base
Most beginner makeup problems are skin prep problems wearing a disguise. Foundation that separates by lunchtime, concealer that creases, or blush that grabs in patches almost always traces back to the order and timing of what went underneath. Work in this sequence and give each layer a moment to settle.
1. Cleanse, then hydrate on slightly damp skin
Cleanse gently, then apply a hydrating serum or moisturizer while your skin is still damp from water. Damp skin absorbs humectants such as glycerin and hyaluronic acid more effectively, which plumps fine lines and gives foundation something smooth to sit on. Dry skin that skips this step draws the water out of liquid foundation and goes patchy within an hour.
2. Moisturizer, then sunscreen, then wait
Apply moisturizer over the serum and let it absorb for a full 60 to 90 seconds before sunscreen. Give the sunscreen another two to three minutes to set. This wait is not optional: layering foundation straight onto tacky sunscreen is the most common cause of pilling, where the base rolls into little balls under a sponge or brush.
3. Primer only where you need it
You do not need primer all over. On oily or combination skin, use a mattifying primer just on the T-zone. On dry skin, use a hydrating primer, or simply let the moisturizer do the job. On visible pores or texture, press a blurring primer only into those areas. Do not layer a silicone-based primer over a heavy oil-based moisturizer, because the two will separate and the foundation will slide.
Tools, Textures, and the Mistakes That Make Natural Makeup Look Heavy
Natural makeup is judged on texture, not on how many products you own. Choosing the right delivery method for each product matters more than the brand, and a few repeatable habits prevent the caked, overdone result beginners are most afraid of.
Match product texture to your skin type
- Dry skin: liquid or cream foundation, cream blush, and a hydrating tinted balm. Powder products cling to dry patches and emphasise flakes.
- Oily skin: a lightweight liquid or powder-to-cream foundation, cream blush buffed in thin, then a light dusting of translucent powder on the T-zone only.
- Combination skin: cream base plus powder setting on the shine-prone areas, leaving the cheeks and jawline unpowdered so the finish still looks skin-like.
The four tools a beginner actually needs
A damp makeup sponge for the base gives the most natural, streak-free finish. A small fluffy brush places blush precisely on the apples of the cheeks. An angled brush fills brows with short strokes. A spoolie brushes brow hairs into place. Wash the sponge and brushes once a week with gentle soap, because dirty tools are a direct cause of breakouts and of uneven, muddy application.
Five beginner mistakes worth avoiding
- Starting with too much product. Begin with half a pump of foundation; you can always add, never remove.
- Stopping at the jawline. Blend the base down the neck so the face and neck do not read as two different colours.
- Matching foundation indoors. Check the shade on your jaw in daylight before buying.
- Applying concealer before foundation. Foundation first, then conceal only what is still visible.
- Powdering the whole face. Powder only where shine actually appears; all-over powder flattens a natural finish.
Touch-ups that keep the look natural
Carry three things, not a full kit: blotting papers, a tinted balm, and the concealer you used. Blot shine by pressing, never rubbing, because rubbing disturbs the base underneath. Sheer out any crease under the eyes with a clean fingertip before adding product, and remember that a natural look is supposed to show skin, so resist re-caking the T-zone at lunchtime.
Frequently Asked Questions
What is the first step of a natural makeup look?
Skin prep. Clean and moisturize your face first so products glide on evenly, and always finish with sunscreen. A smooth, hydrated base is what makes the rest of the routine last all day.
What kind of foundation should a beginner use for a natural look?
A lightweight foundation or tinted moisturizer. Apply a small amount to the center of the face and blend outward with fingers, a brush, or a damp sponge, then add a dot of concealer only under the eyes and on blemishes.
How do I fill in my eyebrows naturally?
Use an eyebrow pencil or powder to fill sparse areas with short, hair-like strokes, then brush the hairs into place with a spoolie. The result should look groomed rather than drawn on.
Which eyeshadow and mascara suit a natural look?
Stick to neutral eyeshadows: a light shimmery shade across the lid and a slightly darker matte shade in the crease for subtle definition. Finish with just one or two coats of mascara on the top lashes.
What blush and lip products keep makeup looking natural?
Cream blush gives the most skin-like finish - smile and tap a small amount on the apples of the cheeks, blending up toward the temples. For lips, choose a tinted balm or lipstick one or two shades darker than your natural lip color.